
How To Adjust a Sticking Door


Problem: Sticking Door
What makes the door stick in the first place?
Sticking doors are one of life’s annoyances. I have a friend who simply stopped using an exterior door at her house because it sticks so badly. She nailed it shut. While that certainly eliminated the annoyance (she never fights with the door anymore), it created a new one…having to use a different door.
In most cases, a sticking door is simply caused by screws that have become loose or stripped. I remember my dad telling me to stop swinging on the door (come on, we’ve all done it!) when I was a kid. Now I know why….he was in charge of door repairs at our house.
We’re tackling an interior door in this project, but the concept can for exterior doors, as well.
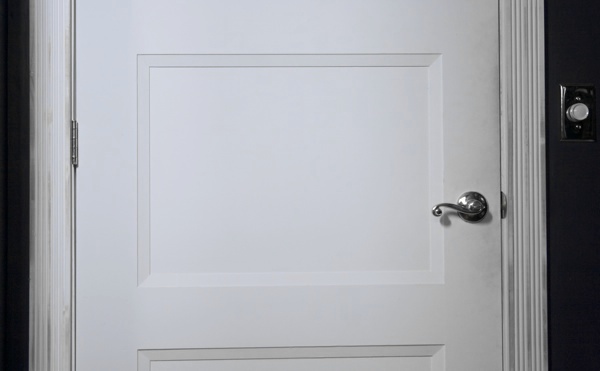
A door is nothing more than a rectangular object placed into a rectangular opening and held there with hinges and a latch. Tolerances around a door are usually 3/16 of an inch or less, so it doesn’t take much movement out of square for a door to start rubbing the door jamb.
Doors with three hinges are like see-saws turned on their side. The middle hinge is the see-saw pivot, in effect. That means that if the door is sticking on the upper right, there’s likely a larger gap on the lower right and vice-versa. Both of those gaps should be the same – and here’s how you can get them back into alignment.
Tight & Bright
Clean, Tight & Bright – that was our motto in Auto Shop class in school. It was preached to us every day. I didn’t fully appreciate its importance until I was older, of course. But if you make sure on any project that everything can be described that way, there’s a good chance it will work and look good at the same time.
With that in mind, look at a sticking door in the same way – make sure there are no foreign objects obstructing the hinge action (clean), make sure all fasteners are doing their job (tight) and make sure that everything is generally polished, in a manner of speaking. Keeping all the mechanisms bright and shiny goes a long way in keeping them in top operating shape (bright)!
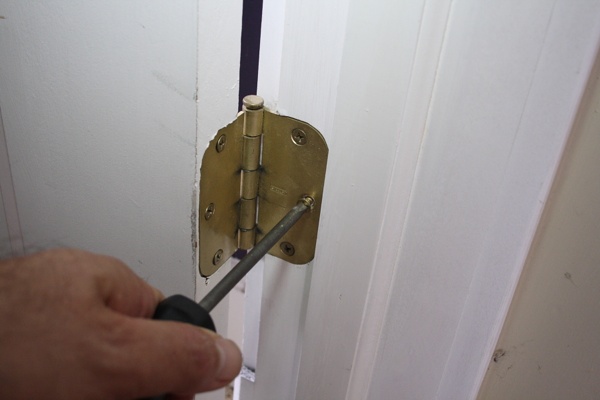
The first and easiest thing to do is check the hinge pins. They can sometimes ride upward in the due to lack of lubrication or dirt in the hinge barrel. If this happens, it can cause the door to sag slightly and rub on the latch side.

To fix this issue, use a hammer with a piece of tape over the head to drive the hinge home. The tape helps minimize damage to the hinge finish or the paint in the door. Be gentle…it should only take a few tight taps to seat the pin.


Once the hinge pins are sitting in the proper place, take a look at the hinge screws. They should all be present and accounted for – and screwed snugly in.
Tip:
If you find that one of the screws simply turns without getting tighter, it’s likely the hole has become stripped – it can no longer hold the screw tightly. The fix is simple –remove the screw and insert a wood toothpick into the hole about an inch and snap it off. This will minimize the excess space in the hole and give the screw something to grab hold of. Replace the screw and tighten slowly to see if this helps.

 Next, look at the latch and strikeplate. Each will have a couple of screws that should be checked and tightened if loose.
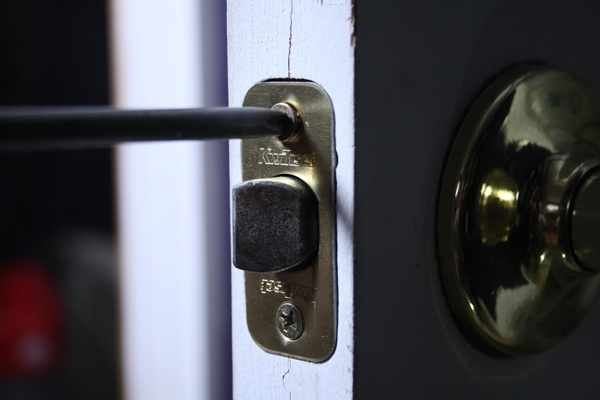

Screws that are as little as a fraction of an inch too proud of being seated properly can cause a door to stick. You’ll generally see scratches made by the screws if this is the case. That would be a clue that they need tightening.
High Spots
A high spot in the wood of the door can also cause it to stick. The sticking action will often leave a telltale shiny, buffed mark where the friction is occurring. It could also just present itself as scratched paint.
Although high spots could be present anywhere on the door’s perimeter, they usually end up at the top and bottom corners. Look for the telltale missing paint or buffed spot, then use sandpaper wrapped around a small block of wood to smooth out the bump.
 The block keeps the paper flush against the side so that you don’t round off the edges of the door. After every few strokes, test the door for proper operation.
The Major Tweak
The last trick involves two different steps that work in conjunction with each other. If the door has become out of square in its opening, these two actions are your best shot for correcting the problem.
If the door is sticking at the top corner on the latch side, here’s what to do: Remove the screws from the bottom hinge where it’s connected to the door frame. Be sure to support the door with a book or something similar to keep if from swinging or dropping on your fingers.


Cut a piece of cardboard from a cereal box to fit behind the flap of the hinge you just loosened. You may want to cut a couple, just in case the added thickness is needed.

Slide the cardboard into place and close the hinge over the top of it, then re-install the screws, simply pushing them through the cardboard. If it’s difficult to push the screws through the cardboard, use a small nail to make the hole


Next, double-check the tightness of the top hinge, making sure all the screws on the frame and the door are completely seated. Test the door again to see how the repair worked.
For doors sticking on the bottom of the latch side, simply reverse the actions. In other words, install the shim in the top hinge and tighten the bottom.
A Little Extra Maintenance:
Because hinges are constantly opening and closing, it’s a good idea to keep them well lubricated. Not only could this help prevent sticking, but also eliminates a lot of unnecessary squeaks and creaks!
To properly apply the lubricant, it’s best to lift the hinge pin slightly from the barrel. Just a ½ inch or so will do. Use a flat screwdriver and hammer and give the pin a little tap from underneath.

Tip:
You can put a small piece of duct tape over the tip of the screwdriver to help prevent nicking the finish or the paint, as well.
 Then, give it a quick shot of silicone lubricant. You don’t have to saturate the hinge to be effective. Open and close the door a few times to work the lubricant in. Wipe up any excess with a rag.
 Taking the time to do this every year will help prevent a lot of annoyance later!For more How-To projects and tips for your home, Buy Brad's Book, Spend-A-Little, Save-A-Lot Home Improvements by clicking the button below: